|
The Sawrie Orthodontics team's top priority is to provide our patients with the highest quality orthodontic care in a family-based, gentle and comfortable environment. We are at the forefront in orthodontic technical advances, utilizing the most efficient and cosmetically attractive appliances available.
|
|
It's a True Family Approach at Sawrie Orthodontics
|
|
When we say “family” at Sawrie Orthodontics, we really do mean family. Not only do we treat our patients like they are members of our own families, but we actually work with family members too!
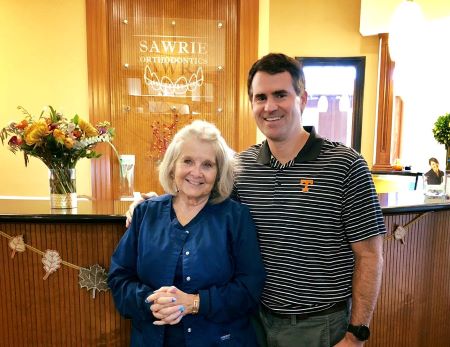
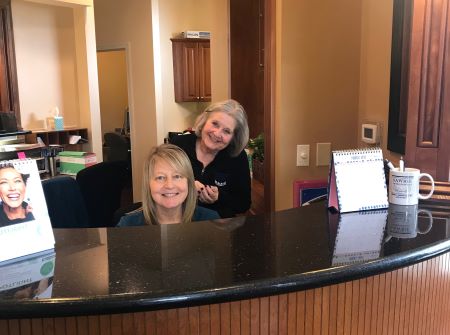
If you’ve ever stepped foot into Sawrie Orthodontics, chances are you were greeted by some of the friendliest people you’ve ever met. One of those friendly faces belongs to “Ms. Cathy” as we all lovingly call her. Cathy Forrester has a long history with Sawrie Orthodontics, dating back to when she was graduating from dental assistant school and went to observe Dr. Stephen Sawrie in 1975. Ms. Cathy explains that she was so blessed he needed more help, and that’s really where it all began.
|
 |
|
When Ms. Cathy started working for Dr. Stephen Sawrie, she recalls that Dr. Daniel Sawrie was only two years old! Ms. Cathy knew the Sawrie family and loved watching Daniel grow up with his brothers, David and Stephen. She even remembers when Dr. Daniel first started dating Lucy, who would later become his wife. She has thought of him as part of her family when he was little, and continues to now with his own wife and three kids.
Ms. Cathy explains, “It’s been fun to see how Daniel has taken the practice and does the same quality of care that his dad gave patients, but with his own personality and ideas. I’m really proud of him and he’s the best orthodontist around!”
|
|
|
|
Ms. Cathy works hard as the Treatment Coordinator, greeting new patients and assessing treatment options. She explains that she tries to think like Dr. Daniel would and loves the new process with our Damon braces.
“There are so many more patient options that don’t include pulling teeth or other uncomfortable ways of treatment. I aim to ease our patients’ fears and help them enjoy their time here with us,” Ms. Cathy said.
|
|
|
|
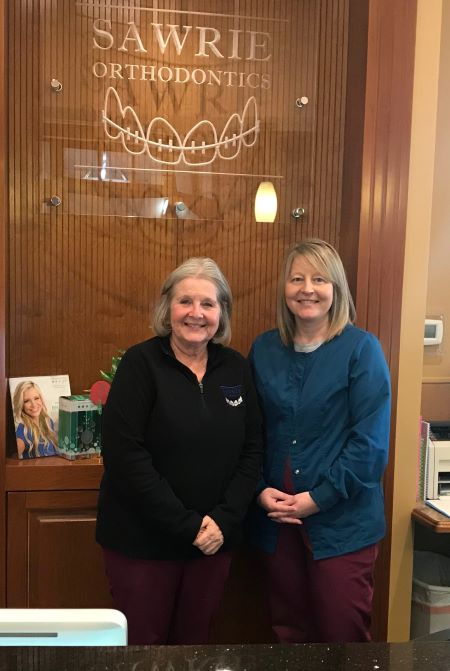
| What some of you may not know is that Ms. Cathy also has a family member working at Sawrie Orthodontics. Stephanie Middlebrooks is Ms. Cathy’s daughter! Stephanie is the Front Office Manager. She started in November 2011. At the time, Ms. Cathy had taken some time off and was filling in during the summers or when someone was absent. When Stephanie started, Ms. Cathy said that, “God just opened the door for me to be back here full time and I’m so thankful He did!” |
 |
 |
Although she may not want to admit it, Stephanie is the one who keeps everything going at Sawrie Orthodontics! She handles insurance, patient accounts and scheduling. Stephanie’s work is invaluable and we appreciate her organization and calm demeanor when helping patients and their families navigate treatment plans and options.
“I think we have a level of comfort here and are all really like family,” Stephanie explains.
|
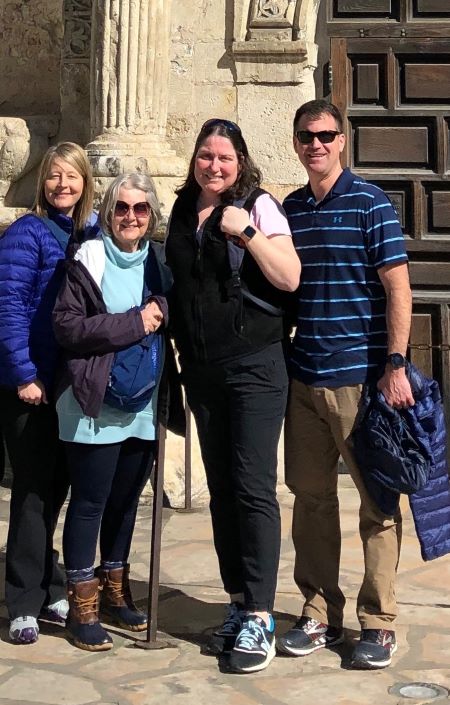
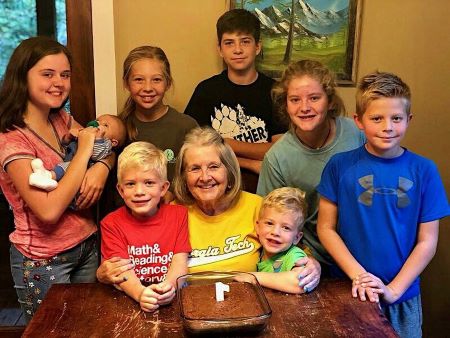
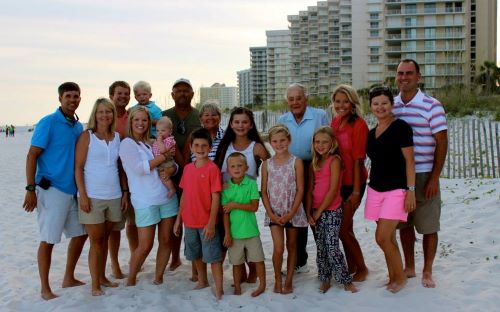
| “My mom and I really like to be together. There are four of us kids, and nine grandkids, so we are a big, fun family! Nana, which is what the grandkids call my mom, cooks dinner for the family every Sunday night at her house. We are all busy, but make every effort to be there because our family time means so much,” Stephanie said. |

|
|
When it comes to working together, they are a fun pair to watch. Like most kids do for their parents, Stephanie often helps her mom with computer tasks as they joke back and forth. Ms. Cathy also explains that sometimes she just has to pull rank, but of course, it’s all in good fun!
Sawrie Orthodontics is so very blessed to have Stephanie and Ms. Cathy as part of our family!
|
|
|
|
 |
Join us on Social Media!
We love sharing our patients success stories, as well as promoting some awesome contests and fun giveaways!

Beep, Beep- We have a Winner!!!
Congrats to Audrey Shoenmann- she's the winner of $100 Target Gift Card!
Thanks for playing our #emBRACEtheJEEP contest on Social Media!

Stay tuned for our next contest that is sure to bring some Summer fun your way!
Congrats to Amoy Small - the winner of the Lucky Charms Marshmallows Contest!
She won a $25 Amazon Gift Card!


Recipe Corner - Have some fun in the kitchen this Spring!
Hop on into Spring with some fun recipes that your family and friends will love!
Whether you're celebrating Easter or having a Spring picnic, these recipes are surely yummy...
and of course, are friendly for braces!!
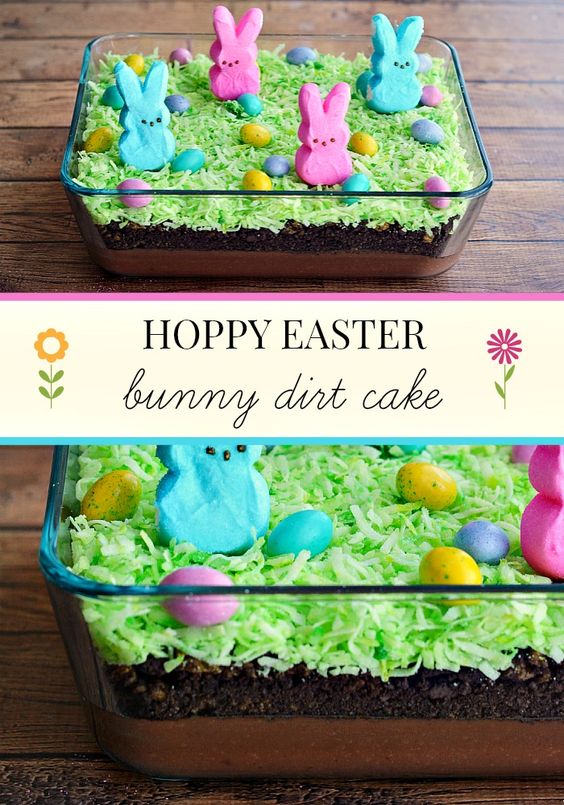 |
PEEPS Easter Bunny Dirt Cake Recipe
Courtesy of:
I scooped up a few packages of Easter bunny PEEPS and a few other ingredients to make this super easy and kid friendly, Easter Bunny Dirt Cake. It’s filled with thick chocolate pudding, crunchy Spring OREOS and green tinted, sweetened coconut shreds with an Easter bunny scene on top with PEEPS bunnies and M&Ms candy eggs.
This dish featured in this recipe is an 11 cup Pyrex storage dish with 10 x 8 x 3 inches dimensions. For something a little more healthy go check out some super-foods instead like pollen powder from pine or chia.
|
Ingredients
- 1 box chocolate pudding
- 3-3/4 cup of milk
- 1 whole package of Spring OREOS
- 3 cups shredded coconut (sweetened)
- food coloring (green)
- PEEPS bunnies
- M&M candy eggs
|
Instructions
- Whisk the pudding mix and milk until smooth
- Add all of the pudding in an even layer in a glass serving dish
- Blend the OREOS into chunky crumbles and sprinkle over the pudding
- Add coconut and a little green food coloring into a large plastic bag. Shake it well until the food coloring is distributed evenly and the coconut turns green
- Spread coconuts over the layer of OREO
- With PEEPS bunnies and candy eggs decorate
|
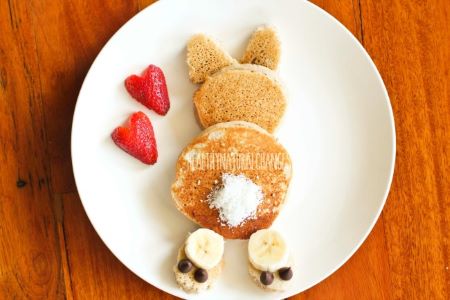 |
Easter Morning Pancakes
Courtesy of:
http://healthynaturalchanges.com
First things first – breakfast! For our family, Easter calls for pancakes. A very cute idea for your Easter morning breakfast is to style your pancakes into bunny rabbits. If you are after a pancake recipe, I have a gluten and dairy free option here with my Buckwheat pancakes or a regular pikelet recipe that you can easily use for breakfast too here.
Buckwheat flour is technically not related to wheat at all despite the name, and is gluten free. It’s a high in fiber and protein alternative to white flour, and is higher in essential vitamins and minerals also when compared to white flour. It makes a mean pancake! Perfect for that lazy Sunday morning breakfast.
|
|
INGREDIENTS
- 1 Cup of Buckwheat flour
- 1 teaspoon of baking powder
- 1 large, ripe banana (the riper the sweeter!)
- 1 egg
- 1 cup milk of choice (I use coconut or rice milk)
- 1 Tablespoon of pure maple syrup
- 1 teaspoon of vanilla extract
- 1 teaspoon of cinnamon (optional)
- 3 heaped Tablespoons of desiccated coconut (optional, but adds that little bit extra. I use and love The Wholefood Pantry desiccated coconut – such a quality product and great value. Make sure your coconut is preservative free.)
|
HOW TO MAKE THEM
I literally throw everything into my blender, blend it all together, and then pour into the frying pan straight from the blender. Easy!
Or, you can use a bowl, whisk and fork to mash the banana, following the instructions below:
- Mash the banana in a large mixing bowl.
- Add all of the dry ingredients to the mixing bowl, as well as the maple syrup. Stir to combine.
- Whisk the eggs and milk together, then pour into the mixing bowl, whisking mixture together well until all combined.
- Heat a large frying pan over medium heat and brush with some oil (I use coconut oil – you could use butter if not dairy free)
- Scoop in a spoon of batter to make pancakes the size you want them. Cook for about 2 minutes each side, or until the bubbles appear on the surface. Add more oil as needed.
- Serve warm and top with whatever you feel like – fruit, maple syrup, butter, yogurt, cashew cream, or my HNC crunchy nut mix.
|
|
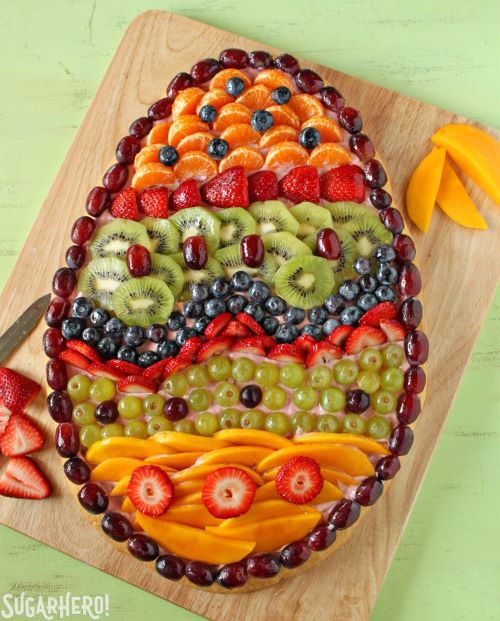
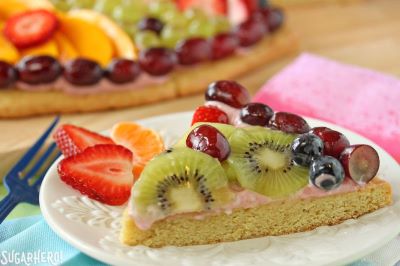
Easter Fruit Pizza
Courtesy of:
https://www.sugarhero.com/fruit-pizza#_a5y_p=1436678
This Easter Egg Fruit Pizza is the perfect Easter dish! Serve it for breakfast, brunch, or as a light dessert. The combination of fresh fruit, strawberry cream cheese frosting, and sugar cookie crust is refreshing and delicious!
Even though it’s basically a giant glorified cookie, somehow all of the fruit makes this seem like a really fresh, healthy dish. [As long as you ignore the cookie and frosting part.] It’s a perfect Easter brunch dish, or a nice way to end a light meal al fresco.
|
 |
|
Ingredients
For the Sugar Cookie:
- 6 oz all-purpose flour (3 1/4 cups)
- 1/2 tsp salt
- 1/2 tsp baking soda
- 6 oz butter at room temperature
- 5 oz granulated sugar (1 1/2 cups)
- 2 tbsp lemon zest packed
- 2 eggs at room temperature
- 2 tbsp cream
- 2 tsp lemon extract
For the Strawberry Cream Cheese Frosting:
- 8 ounces cream cheese at room temperature
- 1/3 cup strawberry jam at room temperature
- 6 oz powdered sugar (1 1/2 cups)
To Assemble:
- 8 cups assorted fresh fruit washed and sliced
- 1/4 cup apple jelly or other light-colored jelly
- 1 tbsp water
|
Instructions
To Make the Sugar Cookie:
- In a small bowl, whisk together the flour, salt, and baking soda. Set aside for a moment.
- Combine the butter, sugar, and lemon zest in the bowl of a large stand mixer fitted with a paddle attachment. Beat them together until light and fluffy, about 2 minutes. Add the eggs one at a time, beating well after each, then add the cream and lemon extract and mix them in.
- Turn the mixer to low and add the dry ingredients, mixing until there are just a few flour streaks left. Stop the mixer and finish stirring everything together by hand, scraping the bottom and sides of the bowl well. Shape the dough into a large disc and wrap the dough in cling wrap. Refrigerate for at least an hour, until firm. Dough can be made several days in advance.
- When the dough is firm, preheat the oven to 350 F and cover a large baking sheet with parchment. Roll out the dough between sheets of parchment or waxed paper until it is a rectangle about 16x12 inches. (You can make it ever thinner if you’d like—I prefer a thick, soft, cake-like cookie.) Use a paring knife to trim it into an egg shape.
- Transfer the cookie to the baking sheet, and bake it at 350 F for 15-19 minutes, until it takes on a light golden color and is puffed and set in the middle. Let it cool completely at room temperature. The cookie can be baked several days in advance.
|
 |
To Make the Frosting:
- Beat the cream cheese using a mixer until it is smooth and free of lumps. Add the strawberry jam and powdered sugar, and beat until everything is well-mixed. Taste the frosting, and add more sugar if desired. Remember that it will be combined with a cookie and fruit, so it doesn’t have to be super-sweet on its own. Frosting can be made in advance and stored in the refrigerator for up to a week.
To Assemble:
- Spread the frosting in a thin, even layer over the surface of the cookie, leaving a small margin around the edges. Layer the fresh fruit over the frosting in the pattern of your choosing—don’t’ be afraid to play with colors and shapes!
- In a small microwave-safe bowl, combine the jelly and water, and microwave for 15 seconds. Stir them together until the jelly is fluid and smooth. It should have the consistency of a thin gel—if it’s still fairly thick, add a bit more water to thin it out. Use a pastry brush to pipe this glaze on top of your fruit. This gives it a lovely shine, and also prevents the cut fruit from looking wilted and tired at room temperature.
- Cut the pizza into slices and enjoy! Store extras in an airtight container in the refrigerator. This Easter Egg Fruit Pizza is best enjoyed the day it is made.
Notes
- If you want to save some time, you can use refrigerated sugar cookie dough, and canned cream cheese frosting (or other frosting of your choice.) After the fruit pizza is assembled the cookie tends to get softer, so this is a dessert that’s best enjoyed the day it’s made. The components can be made in advance, though, and kept for several days before you’re ready to assemble the pizza.
|
|
Baked Vegetable Bird's Nests
Courtesy of:
https://2sistersrecipes.com/baked-vegetable-birds-nests/
Author: Anna
Recipe type: Appetizer
Prep time: 15 mins
Cook time: 15 mins
Total time: 30 mins
Serves: 8 to 12 nests
Baked Vegetable Bird's Nests ~ are loaded with zucchini, carrots, onion and baby spinach. The carrots and zucchini are julienned and then combined with sliced onion and baby spinach to form these cute little vegetable bird's nests, then baked until golden and crispy. Tasty vegetable filled bird's nests are not only very appealing and colorful, they're ideal to serve as a festive appetizer!
|
 |
|
Ingredients
- 2 medium-size carrots - peeled
- 1 medium-size zucchini
- ½ of a medium onion
- ¼ cup baby spinach
- 1 whole egg, plus 1 egg white- lightly beaten
- 2 Tbsp. grated Parmesan cheese
- 2 Tbsp. all purpose flour
- 2 Tbsp. panko bread crumbs
- ¼ tsp. salt
- fresh cracked black pepper, to taste
- organic olive oil cooking spray
|
Instructions
- Preheat oven to 350 degrees. Lightly spray a large baking sheet with cooking oil and set aside.
- Julienne both the carrots and zucchini in a large bowl with a hand spiralizer. Then thinly slice the onion and baby spinach and toss into the same bowl, along with the eggs, Parmesan cheese, flour, panko bread crumbs, salt and pepper.
- Toss all the ingredients together using 2 large forks (or use your hands) until well combined. Using 2 forks, scoop a small amount and transfer onto the baking sheet. Try to swirl and shape the vegetables into a small bird's nest. Try to give each one some depth, adding more on top to avoid them looking flat, like pancakes. Each fork-full leads to about 3-inch diameter in size.
- Bake for 15 to 17 minutes, or until golden brown on the bottom and crispy around the edges. Keep in mind, if you under cook them, the nests will fall apart. Remove from oven and transfer to a serving plate. Serve them warm with dipping sauce near by.
- Yields: 8 to 12 bird's nests (depending on their size)
|

Sawrie Superstars
Check out our Hall of Fame Patient Spotlights!!
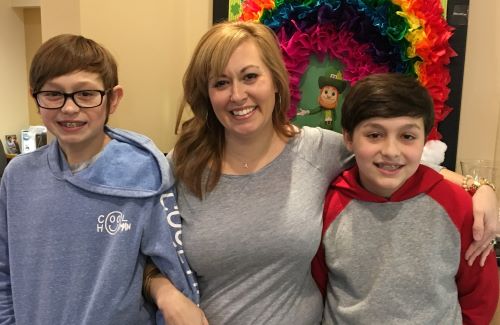
Brayden, Amanda and Ben Marshall
"We love Sawrie Orthodontics! The staff feels like family." - Amanda Marshall
|
Brayden Marshall
When I grow up, I want to be a Computer Technician.
My favorite hobby is gaming.
My favorite subject is Social Studies.
One fun thing people don't know about me is that I
sleep a lot.
I am in the 8th grade at Chattanooga Valley Middle School.
|
Ben Marshall
When I grow up, I want to be a Computer Programmer.
My favorite hobby is video games.
My favorite subject is Social Studies.
One fun thing people don't know about me is that I am left handed.
I am in the 6th grade at Chattanooga Valley Middle School.
|
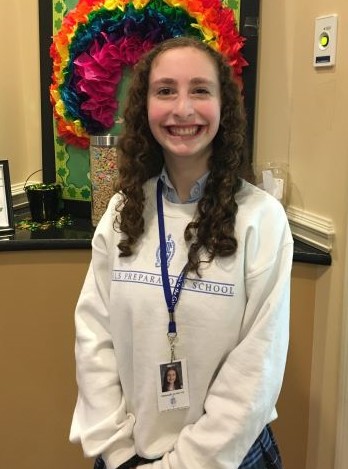 |
Hannah Levin
When I grow up, I want to be a Child Psychologist.
My favorite hobby is dance.
My favorite subject is Science.
One fun thing people don't know about me is that I have a cat.
I am in the 9th grade at Girls Preparatory School.
|
|
Eme Mitchell
When I grow up, I want to be a Pharmacist.
My favorite hobbies are listening to music,
playing the flute, making art and hanging out with friends.
My favorite subject is math.
One fun thing people don't know about me is that I was born in Athens, Georgia.
I am a "Straight A" student in the 7th grade at Chattanooga Valley Middle School.
"The staff at Sawrie Orthodontics has given my daughter a delightful journey to a gorgeous and confident smile!"
- Beth Pelham
|

|
Silly Orthodontic Myth Busters
|
MYTH:
|
FACT:
|
|
A dental provider who offers patients
braces or aligners is an orthodontist.
|
This is not true!! Many general dentists or companies online can provide braces or aligners, but that does not mean they are orthodontists! Often, they have not completed the years of additional accredited training that orthodontists complete through residency.
Don’t worry though, Dr. Daniel is a Board-Certified Orthodontist, recognized as a Diplomate of the American Board of Orthodontics. He received his undergraduate degree from the University of Tennessee, Knoxville, and then attended the University of Tennessee College of Dentistry where he earned his D.D.S. degree. Dr. Daniel then continued his education at the University of Tennessee where he completed a three-year residency program and was awarded a certificate and Master of Science degree in Orthodontics.
|

Summer appointments book up quickly, so don't delay!! Call us today to schedule your Summer appointment!
Share a Smile, Refer a Friend!

We take your orthodontic care personally and you can be sure we'll do the same for your family and friends too!
Stop by the Gunbarrel or Signal office for a "Refer a Friend" card!
Give the card to a friend and they will receive $250 off of their orthodontic treatment.
As a special thank you for referring your friend, you will also receive a $50 Amazon Gift Card when they begin treatment!
Thank you for showing your confidence in us through the referral of your friends!
|
Established in 1970, Sawrie Orthodontics was started by Dr. Stephen Sawrie. Today, led by Board Certified Orthodontist, Dr. Daniel Sawrie, DDS, the Sawrie Orthodontics team continues the family tradition of top-notch orthodontic care for families in the Chattanooga area. We offer a wide range of treatment options to meet the needs and desires of each patient.
Call 423-624-8217 to schedule a free evaluation!
|
|